Implementing Particle Effects in Unity
Particle effects are a great way to add visual flair and dynamism to games or applications. Unity provides a powerful and flexible particle system that allows developers to create various effects. Let's go through the process, including some code snippets and real-life examples.
Setting Up The Particle System
- To get started, create a new GameObject in the Scene and attach a Particle System component to it.
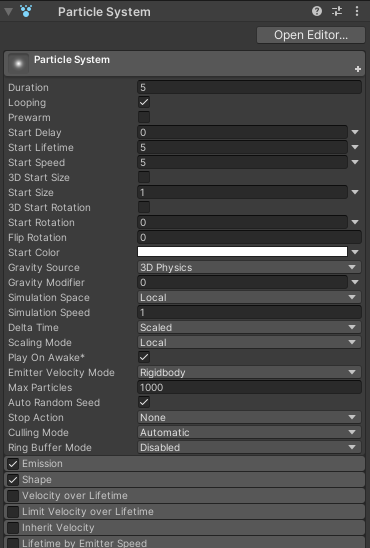
- Right-click on the Hierarchy panel, select "Effects," and then choose "Particle System." The Particle System component will appear in the Inspector panel.

Configuring The Particle System
Configure the particle system to create the desired effect. Here are some important settings that can be modified:
- 'Main' Module: Set the duration, start lifetime, the start speed, and create the size of the particles.
- 'Shape' Module: Define the shape of the emitter, such as a sphere, cone, or box.
- 'Emission' Module: Control the rate at which particles are emitted.
- 'Renderer' Module: Specify the material and render mode for the particles.
Above are just a few of the many settings that can be adjusted to achieve different effects. Experiment with different combinations to get the desired result.
Customizing The Particle Material
To make the particles visually appealing, start by customizing the particle material. Unity offers a variety of built-in shaders and textures. Additionally, a custom material can be created. For example, a material that simulates fire, smoke, or water.
Triggering The Particle Effect
To trigger the particle effect, use scripts and events. For example, one might want the effect to play when a player collects a power-up or when an explosion occurs. Here's an example of a script that plays a particle effect when a collision happens:
using UnityEngine;

public class ParticleEffectController : MonoBehaviour
{
    public ParticleSystem particleSystem;

    private void OnCollisionEnter(Collision collision)
    {
        // Play the particle effect when a collision occurs
        particleSystem.Play();
    }
}
In the above script, we would assign the particle system component to the 'particleSystem' variable in the Inspector. After that, on every collision that occurs the OnCollisionEnter function is called, and the particle effect is played.
Real-Life Examples
- Fire Effect: To create a fire effect, set the particle system's shape to a cone, adjust the color gradient to shades of orange and red, and add some turbulence and flickering using the noise module.
- Explosion Effect: An explosion effect can be achieved by emitting particles from a sphere shape, using a gradient color for the particles that transition from bright yellow to orange and then to dark red. Add some initial velocity to the particles to simulate an explosive burst.
- Magic Spell Effect: For a magic spell effect, emit particles from a point shape and add a trail renderer component to create a trail behind the particles. Also, apply a texture to the particles to give them a glowing or sparkling appearance.
Conclusion
Implementing particle effects in Unity opens up a world of visual possibilities for developers. By leveraging Unity's powerful Particle System, developers can add captivating and dynamic effects to their games and applications. With the ability to customize various parameters such as lifetime, speed, size, and shape, developers can create a wide range of effects, from fire and explosions to magical spells and atmospheric phenomena.